How to Replace Vinyl Siding on House (Step-By-Step, Costs, and When to Call a Pro)
Introduction: Why Replace Vinyl Siding on Your House?
If you need to replace vinyl siding on your house, this guide is intended to provide general guidance on when, why, and how to do it. This guide is for New Jersey homeowners considering vinyl siding replacement, whether for DIY repairs or full professional installation. Proper siding replacement is a popular home improvement project that protects your home from weather damage, increases curb appeal, and maintains or even boosts its value, often delivering a high return on investment.
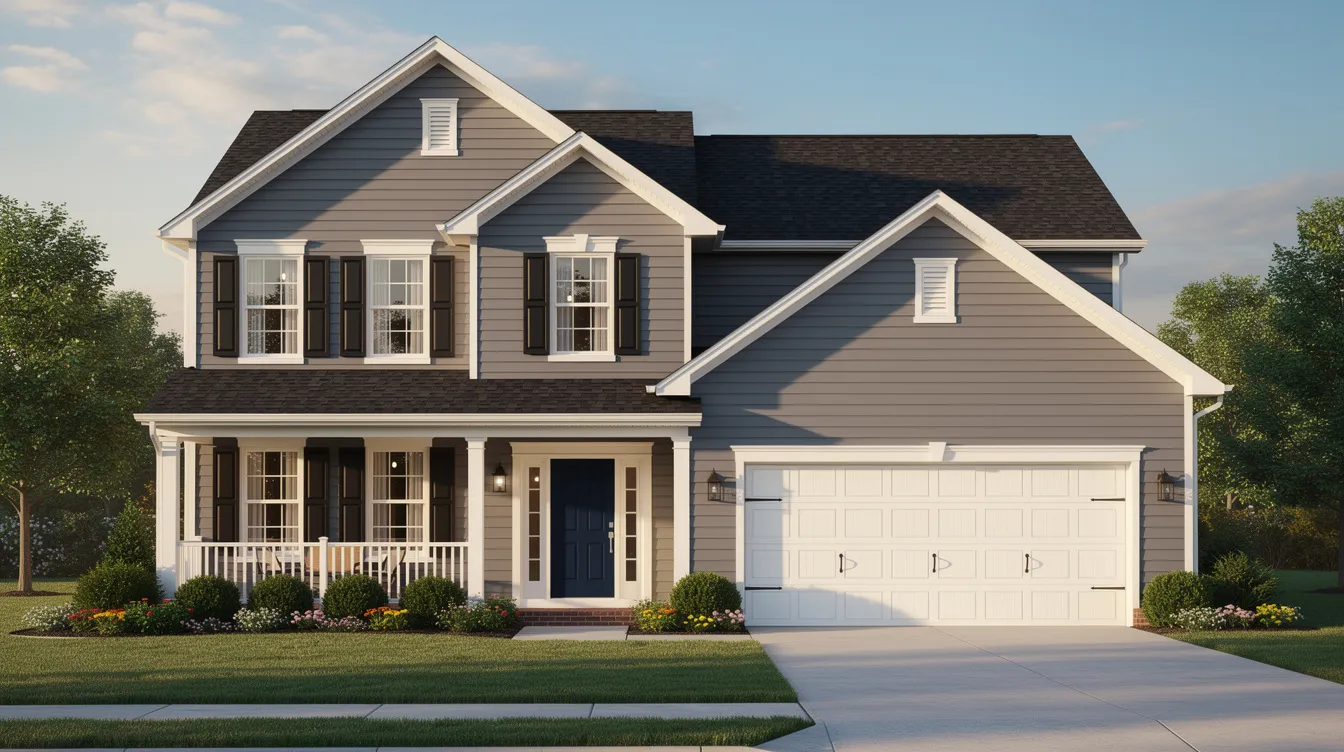
Vinyl siding is made from PVC and other plastics, making it ideal for weather protection and available in many colors. The three most common types of siding are vinyl, wood, and fiber cement, with vinyl siding being one of the least expensive options. For example, vinyl siding typically costs less than brick or engineered wood siding, but it's important to consider compatibility and long-term maintenance when choosing materials for your project. Vinyl siding comes in different grades and thicknesses, which differentiate lower-quality and more affordable options from higher-quality, more expensive ones.
North Jersey’s harsh weather—freeze-thaw cycles, Nor’easters with 50-70 mph gusts, and intense summer UV exposure—causes cracking, warping, and fading over time. Homes sided before 1995-2000 often lack the impact-resistant copolymers found in modern materials. Thicker vinyl siding, typically 0.46 mm or more, is more durable and can last over 30 years, while thinner options may only last around 15 years.
This article covers key signs it’s time to replace vinyl siding, practical DIY steps for small repairs, realistic 2026 costs, and when to hire professionals like American Home Remodeling in Essex, Morris, Union, Sussex, and Bergen Counties. By choosing from different siding materials and configurations, you can create a unique look that matches your home's style and your personal preferences.
Key Takeaways
- Most vinyl siding lasts 25–40 years in New Jersey’s climate, but storm damage, warping, and fading can mean earlier replacement
- Replacing a few damaged vinyl siding panels is a realistic DIY job for handy homeowners
- Full-house siding replacement is best handled by licensed, insured contractors
- Costs range from about $3–$12 per square foot installed in 2026
- Typical North Jersey projects run $8,000 to $25,000+ depending on home size and siding grade
- American Home Remodeling offers free in-home siding consultations and flexible financing (including 0% for up to 18 months for qualified buyers) across Essex, Morris, Union, Sussex, and Bergen Counties
Key Signs It’s Time to Replace Vinyl Siding
Vinyl siding typically lasts between 30 and 40 years, but extreme weather conditions can cause it to degrade faster. In North Jersey, harsh winters and UV exposure accelerate wear on older, thinner products.
Visual signs to watch for:
- Cracked panels
- Broken panels
- Loose siding
- Rattling siding in high winds
- Warped boards
- Buckled boards
- Faded color that cleaning can’t revive (slightly different shades may appear after repairs, but these usually blend in over time)
Functional red flags:
- Water stains on interior walls
- Mold on interior walls
- Higher heating bills
- Higher cooling bills
- Drafts along exterior walls
- Cold spots along exterior walls
- Evidence of carpenter ants behind siding
- Evidence of termites behind siding
Signs that indicate it may be time for replacing siding include visible cracks, warping, or missing panels. If you notice moisture or mold inside your home, it could be a sign of damaged siding that needs replacement to prevent further issues. Don’t worry if you spot minor imperfections during your inspection—these are common and can often be addressed easily.
Homes built before 1990-1995 in Essex County or Union County may need a full assessment even without major visible damage. Hail and storm events can cause impact damage easier to spot on south- and west-facing elevations in Bergen and Morris Counties. Walk around your house twice yearly—spring and fall—taking smartphone photos of questionable areas.
If you notice any of these issues, you may be able to tackle small repairs yourself. A local handyman can also assist with minor siding fixes if you prefer professional help. The next section explains how to replace a few damaged vinyl siding panels.
DIY: How to Replace a Few Damaged Vinyl Siding Panels
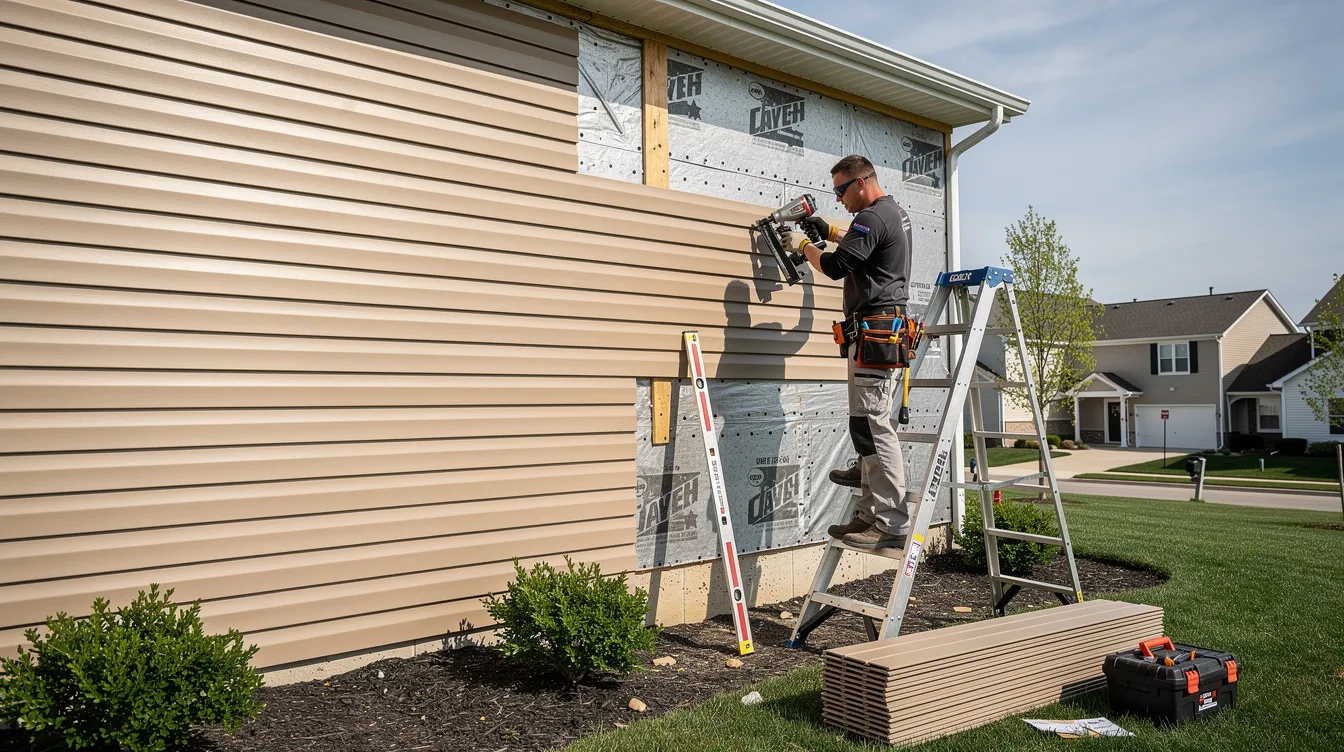
This section covers step-by-step DIY panel replacement for homeowners who want to address minor siding damage themselves. To replace vinyl siding, start by using a zip siding tool to detach the old siding boards from the wall, which will expose the area behind the siding for inspection and repair. When installing the new panel, use a siding nail or a new siding nail to securely fasten the new siding, making sure to properly seal the edges for durability. If any wood or primed surfaces are exposed during repairs, apply paint as a protective and finishing step to ensure both protection and a polished appearance. The article also covers the full professional replacement process in the next section, which involves four primary phases: removal, inspection, preparation, and installation.
Safety precautions like gloves, eye protection, and ladder safety are essential. It is recommended to use a two-person approach for safety when handling large panels during installation.
Tools and Materials
| Tool | Purpose |
|---|---|
| Vinyl siding removal tool | Unzips and detaches siding panels |
| Pry bar and claw hammer | Removes nails and panels |
| Galvanized roofing nails | Secures new siding panels |
| Replacement vinyl panels | Matches existing siding |
| Utility knife | Cuts siding to size |
| Measuring tape | Measures panel openings |
| Tin snips | Cuts siding panels |
Color matching older siding (10+ years) can be difficult. Bring a sample piece to a local supplier or ask American Home Remodeling to help source the closest match. Always check for hidden damage—soft or rotten pieces, moisture, or insect issues—behind any panel you remove.
Proper nailing technique, leaving expansion gaps, and using starter strips and J-channels are essential to prevent buckling, allow for thermal movement, and ensure water management. Panel overlap and flat wall preparation are also critical for long-term siding performance.
Step 1 – Remove the Damaged Vinyl Siding Panels
To replace vinyl siding, start by removing the old siding boards using a zip siding tool to detach them from the wall. Hook the bottom lip of the panel above the damaged one and unzip the locking edge along the full length.
Once unzipped, gently pull the damaged panel away, exposing the nailing hem underneath. Work from one end to the other to avoid kinking adjacent pieces. In North Jersey’s climate, work during mild temperatures (50°F–75°F) to reduce cracking risk.
Step 2 – Remove Nails and Inspect the Wall Sheathing
After removing the old siding, take out the nails holding the damaged panel in place, which can be done using a prybar or hammer for leverage. Collect all removed nails in a bucket to avoid lawn hazards.
Visually check the exposed sheathing for water damage, rot, mold, or insect activity. Probe soft spots with a screwdriver. Stop and contact a licensed contractor like American Home Remodeling if you find rotten pieces of OSB/plywood, crumbling insulation, or obvious water intrusion.
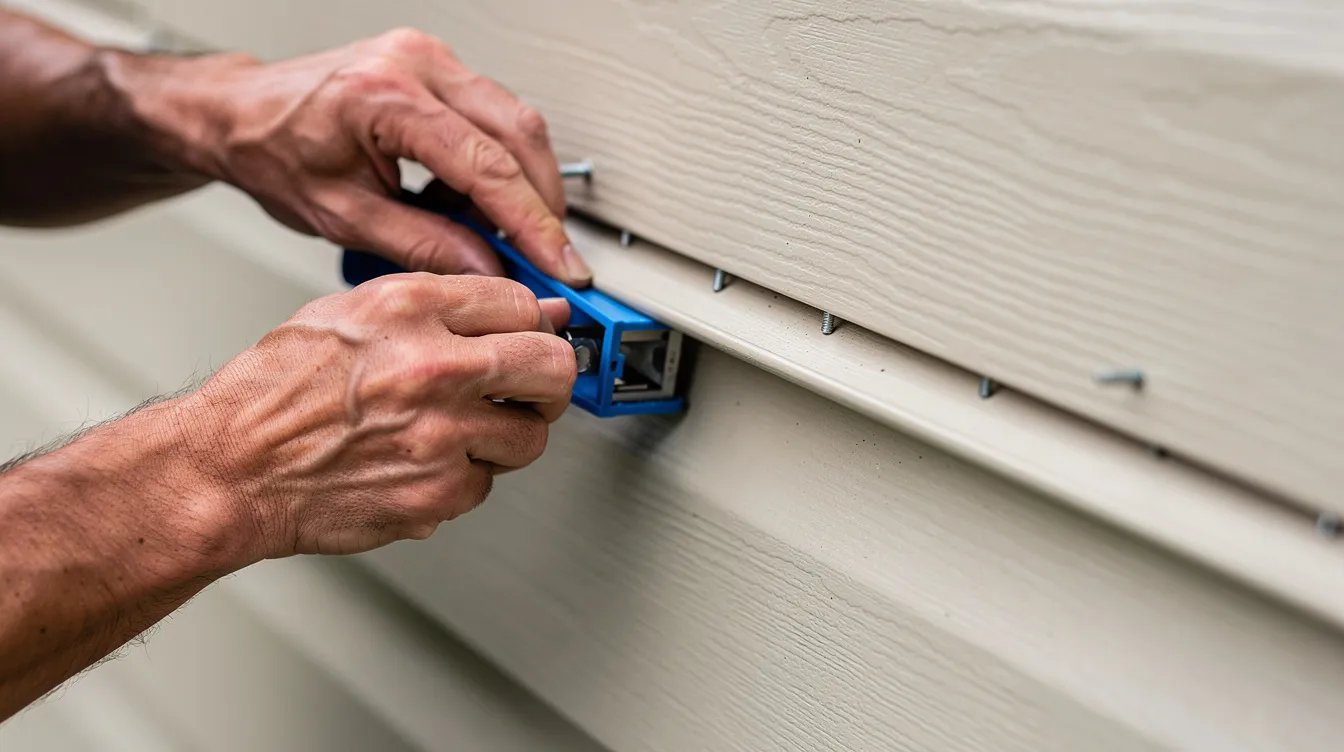
Step 3 – Cut and Install the New Vinyl Siding Panel
Measure the opening and transfer measurements to the new panel, adding about 1/4 inch clearance at each end for thermal expansion. Expansion gaps of 1/4 to 3/8-inch should be left at corners and channels to allow for seasonal temperature changes.
Cut the new piece using tin snips or a siding cutter, keeping factory edges at visible seams. When installing new siding boards, ensure they are the same size or thickness as the existing ones to avoid gaps.
Hook the bottom lip of the new panel into the panel below, ensuring full engagement. A critical rule: nails should be centered in the slots and not driven tightly to allow for movement of the siding panels. Leave about 1/32 inch of play so panels can slide with temperature changes.
Re-lock the panel above using the zip tool, listening for a firm click along the length.
Proper nailing technique, leaving expansion gaps, and using starter strips and J-channels are essential to prevent buckling, allow for thermal movement, and ensure water management. Panel overlap and flat wall preparation are also critical for long-term siding performance.
If your home needs more extensive repairs or you’re considering a full siding upgrade, the next section explains the professional process for full-house vinyl siding replacement.
Full-House Siding Replacement: Process Overview
This section details the full professional replacement process, which involves four primary phases: removal, inspection, preparation, and installation. While DIY repairs are suitable for minor damage, full-house vinyl siding replacement is more complex and typically requires a licensed contractor.
Full-house vinyl siding replacement is more complex than spot repairs, typically taking 3-7 days for an average 1,800–2,400 sq ft home in Essex or Bergen County. Many North Jersey towns require building permits for full siding replacement. Plan around weather—most contractors schedule large jobs for late spring through early fall.
Proper nailing technique, leaving expansion gaps, and using starter strips and J-channels are essential to prevent buckling, allow for thermal movement, and ensure water management. Panel overlap and flat wall preparation are also critical for long-term siding performance.
Removal Phase
Crews set up scaffolding, lay tarps to protect landscaping, and systematically remove old siding from top to bottom. Old materials go into dumpsters for proper disposal.
Inspection Phase
Exposed sheathing is inspected for rot and insect damage. Moisture protection involves installing a weather-resistant house wrap and ensuring proper flashings are in place.
Preparation Phase
Vinyl siding is only as straight as the surface beneath it, necessitating a flat preparation before installation. Any damaged sheathing or insulation is repaired or replaced to ensure a solid base.
Installation Phase
Starter strips must be installed at the bottom, and J-channels should be used around windows and doors for effective water management. Successful vinyl siding installation requires precise techniques to prevent future buckling or warping, including choosing the right tools and preparing the surface thoroughly.
Panels should overlap by at least one inch, and the overlaps should be staggered to conceal seams and prevent water infiltration. Crews custom-cut panels around windows, doors, and vents. A reputable contractor conducts a final walkthrough and reviews warranties.
Once your new siding is installed, it’s important to understand the costs involved and how to save on your project. The next section breaks down typical pricing and money-saving tips.
Costs to Replace Vinyl Siding in 2026 (and How to Save)
The cost to replace vinyl siding ranges from $3 to $12 per square foot installed, with an average total cost of about $12,221 for most homeowners. North Jersey projects typically run $8,000–$25,000+ due to higher labor and disposal costs. For example, replacing vinyl siding on a 2,000-square-foot house might cost around $10,000, while choosing brick siding for the same home could exceed $20,000, and engineered wood siding often falls between the two, averaging $14,000–$18,000. This illustrates how vinyl siding remains a more budget-friendly option compared to brick or engineered wood.
Factors influencing the cost of vinyl siding replacement include the type of siding, home size, complexity of the job, and geographic location. Labor costs for replacing vinyl siding can account for up to half of the total project cost, typically ranging from $2 to $5 per square foot.
Ways to save:
- Select mid-grade vinyl instead of premium
- Choose standard manufacturer colors
- Schedule work in shoulder seasons
- Bundle projects (siding plus windows or gutters)
American Home Remodeling offers free written estimates and 100% financing for qualified customers, including 0% interest options for up to 18 months.
Understanding the value of professional installation is key to a successful siding project. The next section explains why working with a licensed contractor is recommended for full-house siding replacement.
Why Work with a Professional Siding Contractor in North Jersey?
While DIY suits minor panel swaps, full replacement is best done by licensed, insured professionals familiar with New Jersey’s building codes. Expect advantages like correct wall preparation, moisture management, safe scaffolding use, and access to higher-quality materials not sold at Lowe’s or big-box stores.
Permits and inspections matter in Essex, Morris, Union, Sussex, and Bergen Counties. Professional installation keeps manufacturer warranties valid on premium insulated vinyl products. Ask contractors for references, proof of insurance, and clear written contracts.
If you’re ready to move forward, the next section outlines how American Home Remodeling can help with your vinyl siding replacement project.
How American Home Remodeling Helps with Vinyl Siding Replacement
American Home Remodeling, based at 89–91 Coit Street, Irvington, NJ 07111, serves Essex, Morris, Union, Sussex, and Bergen Counties plus Staten Island, Rockland, and Westchester. The company specializes in roofing, vinyl siding, windows, home additions, kitchens, baths, and basements.
The siding service process includes:
- Free in-home consultation and detailed measurement
- Material and color recommendations for local styles
- Permit handling and professional installation
- Thorough site cleanup and warranty review
Typical projects include replacing faded 1980s vinyl on split-levels in Union County, updating wood siding to low-maintenance vinyl in Montclair, or adding insulated vinyl to improve comfort in Sussex County homes.
Contact American Home Remodeling at 973-374-6700 or visit their website to schedule your free consultation.
For more details on timing, maintenance, and local considerations, see the frequently asked questions below.
Frequently Asked Questions About Replacing Vinyl Siding
These FAQs address common questions beyond the main sections, focusing on timing, maintenance, and local considerations.
How long does vinyl siding typically last in New Jersey?
Most mid- to high-quality vinyl siding installed properly lasts 25–40 years, with south- and west-facing walls aging faster. Homes sided in the late 1980s and early 1990s in Essex and Union Counties may benefit from inspection even without obvious cracks.
Can I install new vinyl siding over my old siding?
Installing over sound existing siding is sometimes possible but not always recommended—it can hide underlying moisture or structural issues. American Home Remodeling evaluates old siding condition first and recommends removal when rot or water damage is present.
Will new vinyl siding make my home more energy efficient?
Switching from older, uninsulated siding to insulated vinyl with modern house wrap reduces drafts and stabilizes indoor temperatures. While siding alone won’t replace good attic insulation, it contributes to lower utility costs as part of complete envelope improvements.
What time of year is best for replacing vinyl siding in North Jersey?
Late spring, summer, and early fall are ideal when temperatures are moderate. Some homeowners opt for late winter scheduling for contractor availability, but weather windows must be watched carefully.
Do I need to be home while my siding is being replaced?
You don’t need to be on-site daily, but availability at project start and end helps. American Home Remodeling keeps homeowners updated and secures the property at each workday’s end.